
LinkedIn Sales Navigator Search Guide
“Sales Navigator” is LinkedIn’s automated sales scoring solution. Sales Navigator is an automated tool that lets you track your sales activities in an easy-to-use dashboard. Not only does it automate your sales conversations, but it also allows you to see where you are in your sales pipeline and customize your message to each stage. In this LinkedIn Sales Navigator Search Guide, we will show you how to use the LinkedIn Sales Navigator to automate your sales funnel, increase your pipeline and lead to more qualified sales opportunities.
How to bypass LinkedIn Sales Navigator 2,500 contact record search result limit for your Leadscope campaigns
LinkedIn Sales Navigator Search Guide
On:
(a) how to target 100K plus contacts
(b) how to split a large search without losing track of contacts
(c) how and why to limit your search to 2500 contacts
LinkedIn has approximately 600 million members and offers exciting prospecting opportunities. LinkedIn also offers multiple search filters to refine your search so that you can see only relevant contacts and use LinkedIn as a sales tool. However, since the LinkedIn network is so large, often times search results show up in tens or hundreds of thousands of contacts. One feels tempted to reach all these contacts in order to generate a ton of leads.
But, if you notice carefully, even though LinkedIn displays a large number of contacts, it allows you to actually see only up to 2500 contacts (100 pages with 25 contacts on each page) per search. LinkedIn blocks all search results after 2500 contacts. And that’s the reason our Leadscope software can also only save searches up to a max of 2500 contacts.
So how do you view all the other contacts and connect with them? A simple spreadsheet-based system can solve this puzzle. With a little creativity in using the Sales Navigator’s search filters, this system will help you create multiple “add connection” campaigns on the Leascope platform. Eventually, you will be able to free up a lot of time and focus more on engaging with leads and closing deals. Get the most out of your LinkedIn Sales Navigator account and Learn how to use LinkedIn to prospect, engage, and close new sales opportunities with our LinkedIn Sales Navigator Search Guide and Leadscope.
I will use an example of a search with the job title “Marketing Manager” in the “United States” to illustrate the strategy and the eight steps on how to effectively use LinkedIn sales navigator with Leadscope?
Advanced Search in LinkedIn Sales Navigator
Step 1 – Search your total addressable market on LinkedIn using Sales Navigator
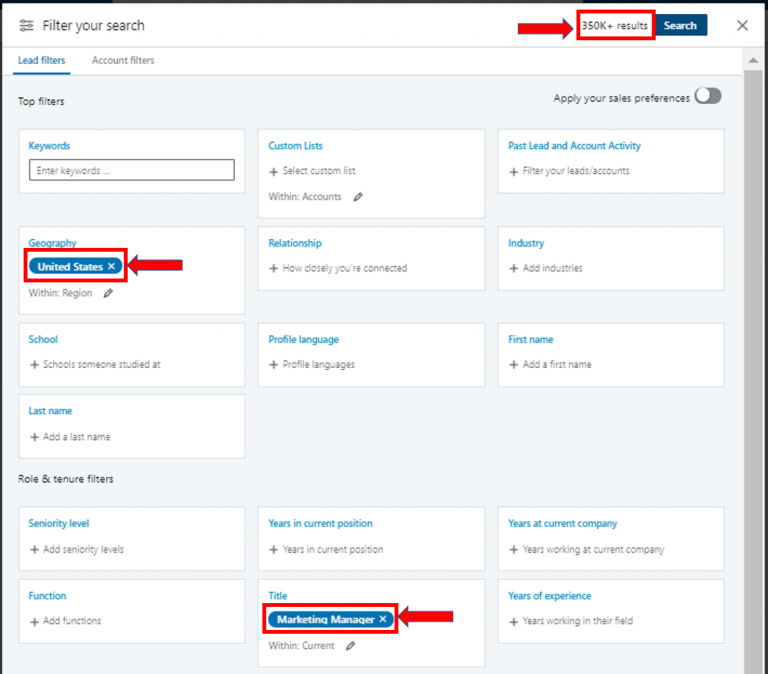
In your Sales Navigator search, hover your cursor on the “Advanced tab” and click “Search for Leads”. In the window that pops up, select “Geography” region as “United States”, “Title” current as “Marketing Manager”.
My search for “Marketing Manager” in the “United States” shows up 350K+ contacts.
Step 2: Add one search filter e.g Industry to narrow your contacts
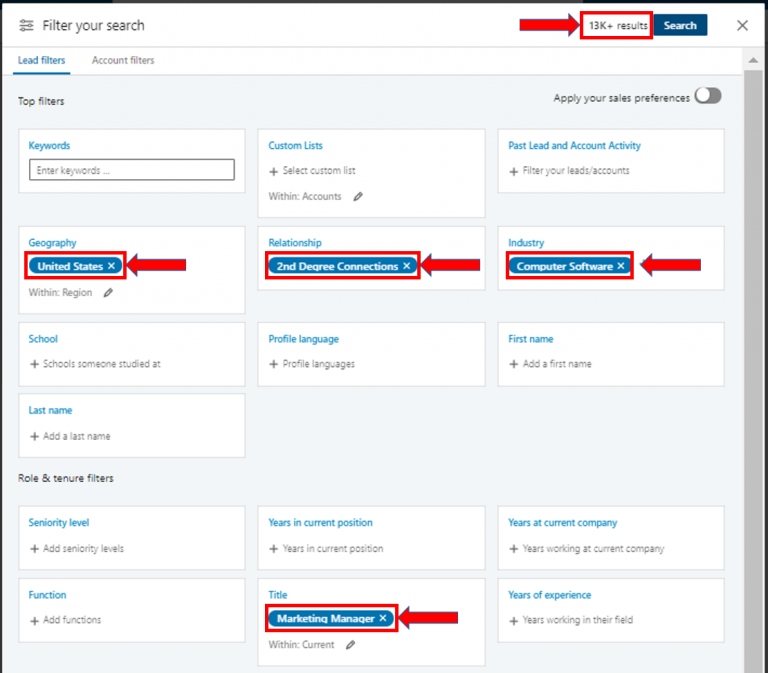
The above number of 350K is too big and includes people that are not relevant to the product I am selling. I want to target Marketing Managers from “Computer Software Industry”. If I add this filter, the total contacts drop down to 13K+.
Since I am planning to run an add connection campaign, I want to make sure that I do not invite 1st-degree connections. I will, therefore, select 2nd and 3rd-degree connections along with Group members.
Step 3: Create a spreadsheet to track contacts on LinkedIn
The number of 13K seems much more manageable. I want to reach out to all 13K contacts, but I cannot do so unless I split this number into smaller lists of 2500 contacts or less. I will start adding more filters to narrow this number. However, I will first put this data into a spreadsheet so that I can remember all the search criteria and corresponding number of prospects per search.
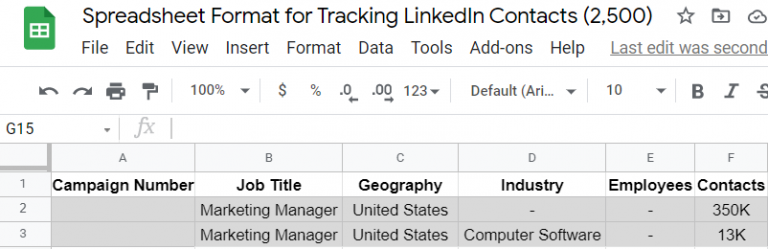
Let’s create a spreadsheet containing all the search filters from Sales Navigator as column headers along with the number of contacts. See the format below:
Step 4: Narrow the geography
Now I will use individual states in the USA to segment my list further. I will start an individual search on each state and write the total number of contacts in the spreadsheet.
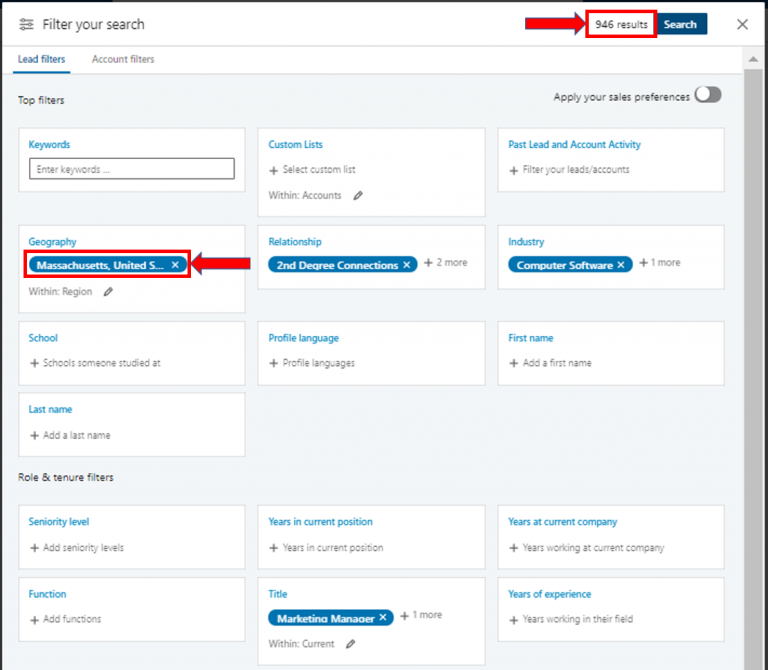
For example, I removed the “United States” from the Geography and selected “Massachusetts” instead. Sales Navigator shows me 946 contacts. I did not change the rest of the criteria.
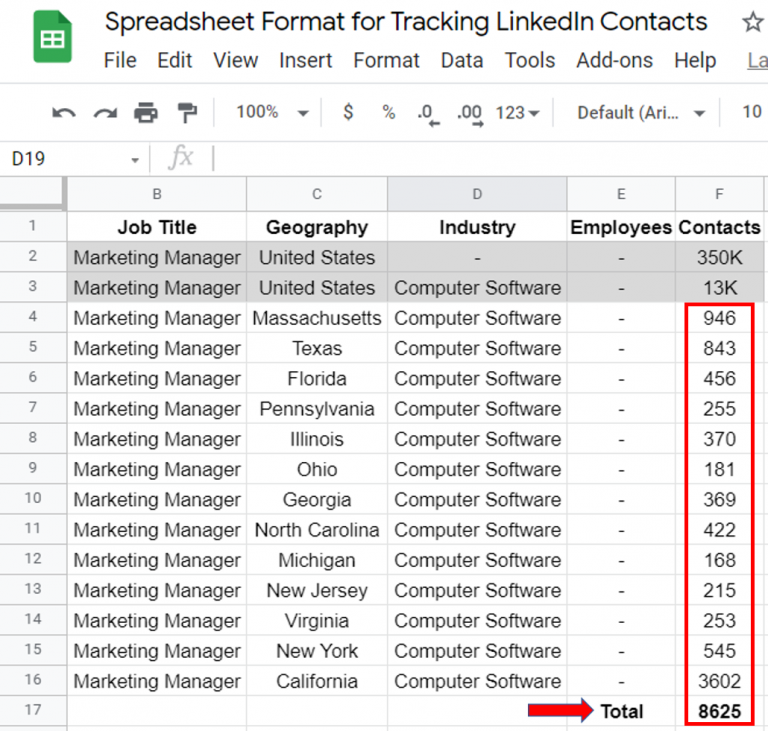
Step 5: Create small geographical units.
Repeat the above step for each state you want to target and write the number of contacts in the spreadsheet. For example, Texas, Florida, Illinois… In this example below I searched for 12 states and got a total of 8,625 contacts. I can keep adding more states until I reach closer to a number of 13K or I can do that later. I will stop at 8,625 contacts as this is adequate for the purpose of this illustration. See how the spreadsheet is filled with smaller data segments.
This spreadsheet format is scalable as I can add more states or pick other industries. Now you are beginning to see how you can use LinkedIn as a sales tool by using this spreadsheet format and Leadscope. Let’s add two more steps to make it even better.
Step 6. Assign Campaign numbers
Now let’s assign campaign numbers to each data set of 2500 or lesser contacts. Notice that if I add contacts for Massachusetts, Florida, Texas and Pennsylvania, I get close to 2,500 contacts. Likewise, the addition of Illinois, Ohio, Georgia, N. Carolina, Michigan, New Jersey, Virginia and New York will give me the next set of 2,500 contacts. Respectively, I have assigned them the campaign numbers. See below how I created 2 campaigns from the same segment.

Step 7: Add another search filter, if required
Notice that California has 3,602 contacts. It needs to be broken down into sub-segments of less than 2500 contacts each. I will add the company size i.e. company headcount filter. LinkedIn provides some standard size ranges based on the number of employees for each company. You can select the company size that you think is relevant to you. See below, how I assigned campaign numbers 3 and 4 for California.
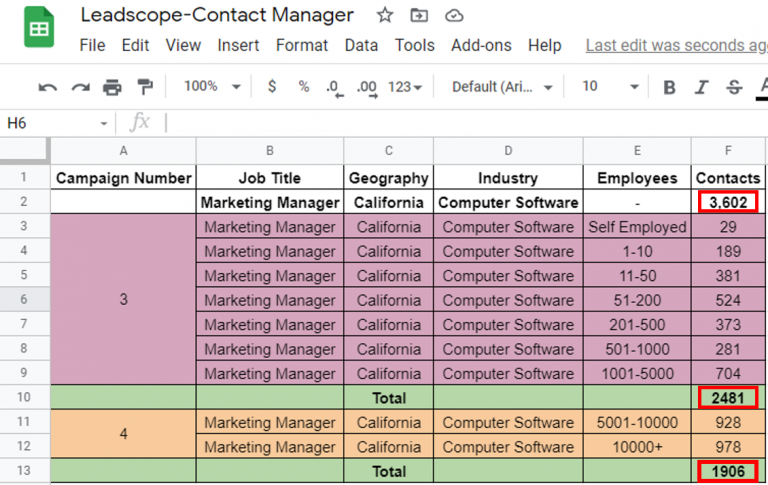
I have now been able to create 2 separate campaigns for targeting 3,602 contacts.
Step 8: Convert the spreadsheet into an actionable Dashboard
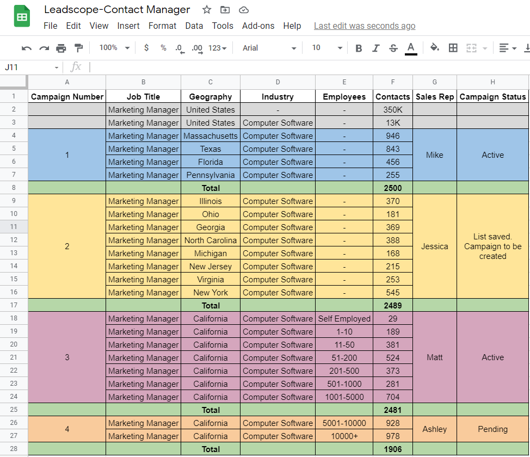
Let’s add some additional columns to the spreadsheet to monitor the campaigns. If you have a team, you can add a column for team members and assign campaigns to them. Your team members can then create the respective campaigns in their Leadscope account. You can also add a “campaign status” column to track active and pending campaigns. Similarly, start date, end date, and comments can be helpful columns.
Finally, you can add some colors to highlight what needs your attention and when. See below how a simple spreadsheet has transformed into an actionable dashboard.
Conclusion
In the above example, I used a total of 4 search filters i.e. Geography, Industry, Job Title, and company headcount. LinkedIn’s Sales Navigator offers a total of 26 different types of filters. You can get creative and use any of the 26 search filters to identify and narrow your target audience. Similarly, you can customize the format of your spreadsheet based on the search filters.
You can now develop your own scalable system like this to keep your LinkedIn searches and campaigns mapped at all times. I hope you can now use LinkedIn for sales more effectively.
Happy Networking!